Choosing a custom patch for chenille is not just about placement, backing options, and size – it’s also about the type of chenille yarn used, such as wool or acrylic. We make chenille patches for personalised use in satin embroidery and chain stitch. But the lifted look of fuzzy yarn has no match. (for me at least) Well, this is just my choice. I love fluffy patches. The more they stand up, the more appealing they feel to my viewers. But this is not always the case; the fluffiness of chenille yarn on patches varies. An initial letter on the jacket in a simple font is recommended for a higher level of chenille, while a complex artwork needs a low pile so it can showcase all details. You never know how much raised-chenille you should go to get the best out of your custom logo. It can be a little confusing to decide if you don’t know all about it. To make this easy, I am going to unbox piles of yarn in terms of fluffiness and the amount of lift-up together in this comparison guide.
Chenille Vs Regular Embroidery
Chenille embroidery is more eye-catching than regular flat embroidery. Chenille is a hot pick for big designs on jackets, while embroidery covers all the types of logos from workshirts to headwear.
Placement/Size
High-raised chenille embroidery looks good on big chenille patches. It works better in open areas, the bigger the design is; it comes out more elegant. Whereas, small chenille patches fit well for low piles. Specifically, when the artwork involves text inside.
How To Make Chenille Patches
At Patches Mania, the procedure for creating chenille patches varies depending on whether the pile is low or high.
Making Low Pile Chenille Patches

When the embroidery machine does it, it is taken to the cropping/cutting department for hot edges and for applying the required backing.
Making High Pile Chenille Patches
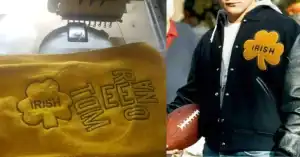
While making high-raised chenille patches, we use flat garment fabric. This backer fabric refers to cotton twill, synthetic felt, woven/unwoven fusing. The next step follows satin embroidery, which creates a roadmap for chenille in the next stage. After chenille yarn fill stitch, it moves to cut off the fabric and then backing application, in the same way as low piles.
Guide To Use The Amount Of Chenille As Per Custom Design
| Design Type | Satin Embroidery | Low Pile | High Raised |
| Mascots | 40% Embroidery | Chenille Yarn | Chenille |
| Alphabets | Outline Embroidery | NiL | Chenille Yarn |
| Numbers | Outline Embroidery | NiL | Chenille Yarn |
| Brand Names | |||
| Complex Arts | 70% Embroidery | Chenille Yarn | NiL |
| Left Breast Logos (Complex) | 70% Embroidery | Chenille Yarn | NiL |
| Left Breast Logos (Simple) | Up to 40% Embroidery | Chenille Yarn | Chenille Yarn |
| Centre Hoodies | Up to 30% Embroidery | NiL | Chenille Yarn |
| Varsity Back | Up to 30% Embroidery | NiL | Chenille Yarn |
| Biker Vest (Front) | Up to 40% Embroidery | Chenille Yarn | NiL |
| Biker Vest (Back Centre) | Up to 30% Embroidery | NiL | Chenille Yarn |
Solution
To get the most out of an order, you need to check back. I highly recommend large-size patches for lifted, high-raised areas. If your logo is small, you need to go for low piles to get the best quality and a cleaner look. I hope this guide helps you distinguish between the two types of chenille embroidery, and I wish you the best of luck in achieving high-quality custom patches.


