Quality customized patches, embroidered, chenille & woven.

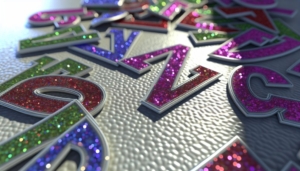
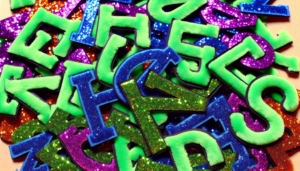
5 Unique Glitter Patch Ideas for Fashion

Glitter patches represent a versatile and dynamic fashion tool with a myriad of applications across different segments of the industry. Denim jackets, for example, can be a good placement for glitter patching. From bags to belts, gaining an individual flair is awesome when customized with glitter patches. Sew-on patches on shoes can be affordable options for next-level DIYing. Above all, clothing pieces transform into fashion statements with well-applied patches. In addition, high fashion designers increasingly incorporate glitter patches into their collections, showing the trend’s edge and influence. The deeper exploration of these elements reveals an expansive array of creative opportunities.

Key Features

  • Create a vibrant look by applying contrasting color glitter patches to a denim jacket.
  • Personalize accessories like bags, hats, or scarves with customized glitter patches featuring your initials or favorite designs.
  • Revamp old shoes by applying DIY glitter patches, reflecting your personal style and taste.
  • Transform a simple t-shirt into a statement piece by adding glitter patches in unique shapes or letters.
  • Incorporate high fashion trends by using sequin or holographic glitter patches on dresses or jeans.

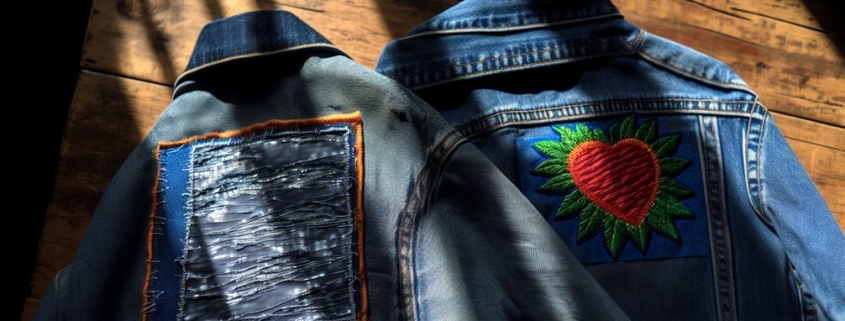
1. Glitter Patch On Denim Jackets

The essence of these jackets lies in the placement of the glitter patches and the color combinations used, which make each piece unique.

Glitter patch placement is vital in determining the overall look of the jacket. Strategically placed patches can accentuate the design, making it more visually appealing. For instance, patches on pockets or collars can draw attention to these areas, adding a pop of color and sparkle.

Color combinations are another significant aspect of these jackets. The right combination can enhance the jacket’s aesthetic appeal. For instance, patches in contrasting colors can create a vibrant, eye-catching effect, whereas matching colors can give a more subtle, sophisticated look.

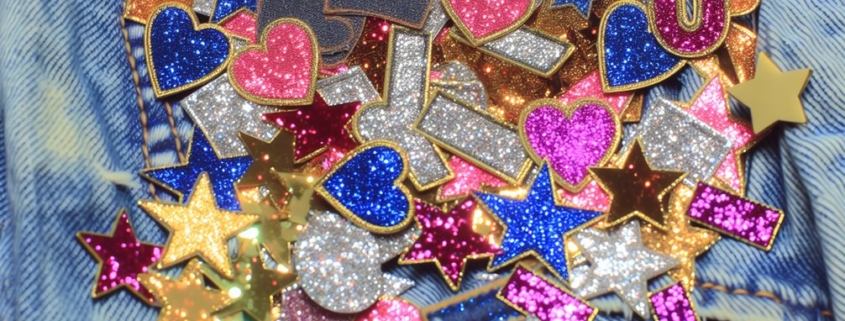
2. Customized Glitter Patch Accessories

The use of personalized glitter takes customization to another level, enabling the wearer to incorporate their choice of colors, designs, and even initials or names into their accessory.

The beauty of these glitter patch accessories lies in their versatility. They can be attached to various items such as bags, hats, scarves, and belts. This flexibility means they can be used to spruce up a casual outfit or add a touch of glam to formal attire.

The design options are limitless, ranging from bold, eye-catching designs to subtle, understated ones.

These glitter accessories, however, require careful handling to maintain their appearance. Regular cleaning is essential to keep the glitter sparkling, and care should be taken not to expose them to harsh conditions that can damage the adhesive.

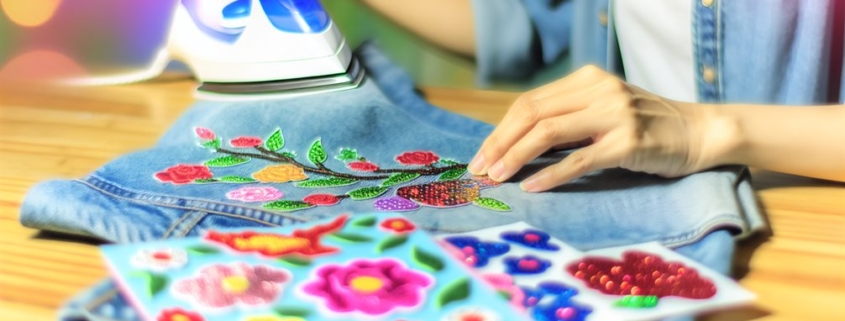
3. DIYing Glitter Patch Shoes

The first step in the DIY glitter patch shoes project is sourcing the glitter patch materials. This includes the glitter patches themselves, which come in various shapes, sizes, and colors. The material can be purchased from craft stores or online.

Additional supplies needed are a strong adhesive, such as fabric glue, and a pair of tweezers for precision.

Understanding the glitter patch techniques is essential in achieving a desirable outcome. Start by cleaning the surface of the shoe where the patch will be applied. This guarantees the adhesive bonds properly.

Next, apply a generous amount of glue to the back of the glitter patch. Using the tweezers, carefully place the patch on the shoe and press down firmly. Allow it to dry completely before wearing.

This simple DIY project can transform any pair of shoes into a fashion statement. Now, step out in style and sparkle with every stride.

4. Statement Glitter Patch Clothing

Not limited to footwear, the application of glitter patches can markedly transform clothing items into extraordinary fashion statements, too.

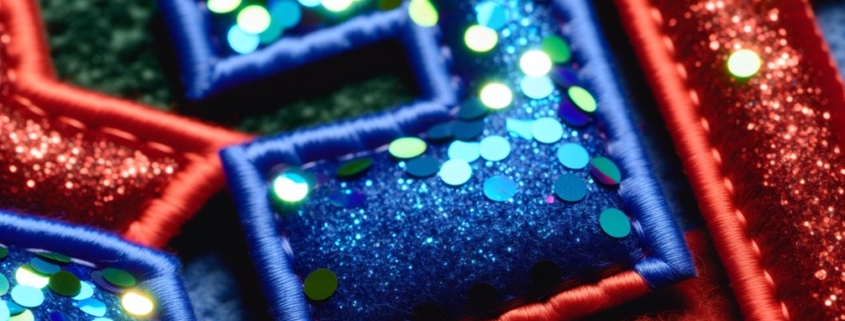
  1. Denim Jackets: A classic denim jacket becomes a vibrant, unique piece when adorned with glitter patches. Whether placed on the back, front, or sleeves, these patches bring a distinctive touch that catches the eye.
  2. T-Shirts: Simple t-shirts can be given new life with the addition of glitter patches. Shapes, letters, or abstract designs, all in glitter, make for striking visual appeal.
  3. Jeans: Glitter patches on jeans add a fun, edgy vibe. Placed on pockets, knees, or randomly scattered, they create an eclectic look.
  4. Dresses: For a truly standout piece, attaching glitter patches on dresses, especially around the neckline or hem, creates an unforgettable statement.

The vast versatility allows for a wide range of design possibilities, promising to turn everyday items into fashion-forward pieces.

5. Glitter Patch Trends in High Fashion

Today, a significant number of high-fashion designers are incorporating glitter patches into their collections, underscoring a growing trend in the industry. This trend is not without precedent; it has roots in the glitter patch history that traces back to the rebellious fashion statements of the 1970s.

The glitter patch is now seen on everything from intricate evening gowns to everyday wear, giving traditional designs a unique twist.

To illustrate, here is a table of some popular trends:

Glitter Patch Type

Designer

Collection

Sequin

Marc Jacobs

Spring 2021

Metallic

Chanel

Fall 2020

Holographic

Gucci

Summer 2020

Textured

Balmain

Winter 2021

These trends in glitter patch use reflect a vibrant and dynamic shift in the fashion industry, demonstrating the power of this unique design element to transform a piece of clothing into a work of art. The glitter patch, with its rich history and high fashion influence, is becoming an indispensable part of the modern fashion landscape.

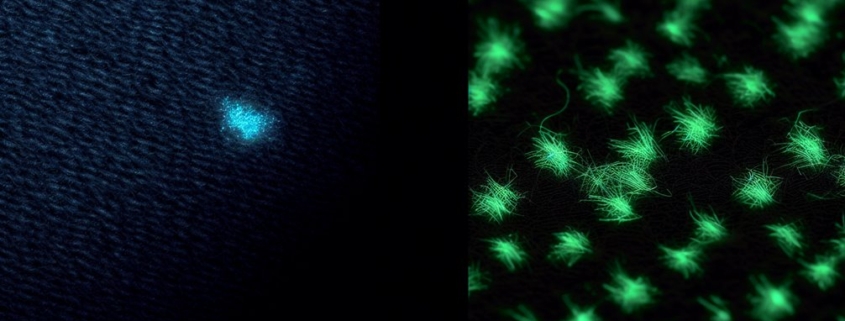
Can I Machine Wash Clothes With Glitter Patches?

Yes, you can machine wash clothes with glitter patches. However, to preserve the glitter patch application, it’s recommended to turn the garment inside out and use a gentle cycle. Always check specific washing instructions.

Are Glitter Patches Skin-Friendly?

Generally, glitter patches are skin-friendly. However, sensitivity varies among individuals. Some may experience skin irritation due to the adhesive used in patch application. Always test on a small area first to guarantee compatibility with your skin.

Can I Use Glitter Patches on Leather Material?

Yes, you can use glitter patches on leather. However, to guarantee compatibility with leather care, it’s important to select the right type of patch and adhesive. Always test on a small area first.

Are There Eco-Friendly Alternatives to Glitter Patches?

Yes, there are eco-friendly alternatives to traditional glitter patches. Biodegradable glitter, made from plant-based materials, offers a sustainable solution for fashion enthusiasts seeking to minimize their environmental impact without sacrificing style.

Glitter Letter Patches – Combo of Fonts, Chenille & Sparkles

Glitter letter patches merge vintage charm with a modern twist. These patches and custom fonts infuse individuality into fashion. Infact, they transform ordinary garments into standout pieces. Ideal for both personal and large-scale applications, they provide robust and vibrant options for various apparel. With options for customization and bulk availability, they present a cost-effective trend for fashion enthusiasts keen to explore further with handbags and accessories, too.

Chenille Glitter Letter Patches

2.5" tall multi color english alphabet and greek chenille letter patches spread over to each other; all on different colors of glitter sheet

In the domain of personalized fashion, chenille glitter letter patches have emerged as a compelling trend, seamlessly blending retro charm with modern flair.

These patches, renowned for their textured chenille material, provide a tactile experience that stands out in contemporary fashion. The added sparkle from glitter varsity letter patches elevates their appeal, making them a favored choice among style aficionados.

Such patches are not merely decorative; they are statements of individuality, reflecting the wearer’s personality with a vintage twist.

Expert analysis reveals that their popularity is fueled by a resurgence of nostalgia in fashion, marrying classic aesthetics with innovative embellishments.

As a versatile accessory, chenille glitter letter patches are adaptable, gracing everything from jackets to bags, thereby enhancing personal style narratives.

Glitter Varsity Letter Patches

Building upon the nostalgic charm of chenille glitter letter patches, glitter varsity letter patches capture the essence of collegiate style with a contemporary twist.

These dazzling fonts bring a vibrant flair to jackets, bags, and apparel, transforming them into statement pieces. Available in bulk, they cater to fashion-forward individuals and businesses seeking to infuse their collections with sparkle and sophistication.

These patches are often sourced through chenille glitter letter patches wholesale, so they offer a cost-effective way to elevate any ensemble.

Key features of glitter varsity letter patches include:

  • Shimmering Appeal: Offers a unique blend of classic college aesthetics with modern glam.
  • Versatile Application: Enhances a variety of garments, from casual wear to formal attire.
  • Durability: Crafted to withstand wear while maintaining their eye-catching allure.

Chenille Embroidered Bulk Patches At Wholesale

Chenille embroidery brings textured elegance to bulk glitter letter patches, making them a sought-after choice for designers and retailers alike. These patches combine the plush feel of chenille with the glimmer of glitter, creating a dynamic visual appeal perfect for fashion-forward applications. Their wholesale availability provides an accessible option for integrating style into diverse clothing lines.

Style

Feature

Application

Chenille Glitter Letter

Textured elegance

Designers & Retailers

Hibiscus Glitter Varsity

Bold and vibrant

Team Apparel & Accessories

Bulk Availability

Cost-effective

Large Scale Fashion Productions

Customizable Options

Personalized designs

Brand Identity & Personalization

With a focus on the hibiscus glitter varsity letter patches, their vibrant hues and durable design promise to captivate any audience.


Best Types Of Keychain Rings for Branding and Promotion

When it comes to choosing the best rings for keychains, you’ve got several options to keep your keys organized and accessible. Plus, you will find loads of benefits in terms of promotion and branding only if you select the right style of ring. Remember, ring material, size, shape, and style make the overall look of the keychain beautiful.

Different Styles of Rings for Keychains

Each style of keyring has its pros and cons so you can find the best fit for your needs. Split rings offer secure attachment but can be tricky to use. Snap hooks provide quick access and versatility. Carabiners are strong and great for holding multiple items, while clips are lightweight and easy to handle. Magnetic keychains allow for simple attachment and removal, though they may lack security.

Likewise, classic split rings are durable and easy to use, while carabiner clips, with their one-handed operation, are perfect for outdoor activities. Lobster clasps offer straightforward attachment and detachment, and keychain chains allow for custom organization. Don’t forget decorative keychain rings, which add a personal touch to your carry. Stick around to discover more stylish options!

Best Selling Types of Rings

Which type of keychain ring is best for you depends on your specific needs and lifestyle. If you’re looking for strength and durability, a heavy-duty split ring might be your best bet. For ease of use, consider a snap hook or carabiner-style ring. Here’s a quick overview of some options:

Keychain Ring Type

Pros

Cons

Split Ring

Secure, durable

Harder to attach/remove

Snap Hook

Easy to use, versatile

Can accidentally open

Carabiner

Strong, holds multiple items

Bulkier than others

Keyring with Clip

Quick access, lightweight

May not hold heavy keys

Magnetic Keychain

Simple attachment/removal

Less secure than others

Choosing the right type of keychain ring can make a big difference in your daily convenience.

Different Types of Split Ring Keychain

Split ring keychains come in various designs and materials, each tailored to different preferences and uses.

You’ll find stainless steel split rings, known for their durability, suitable for everyday use. Aluminum options are lightweight and come in various colors, making them ideal for customization.

If you’re looking for something more decorative, split rings adorned with charms or designs add a personal touch to your keys. Additionally, some split rings feature locking mechanisms that prevent keys from slipping off, enhancing security.

You might also encounter heavy-duty split rings designed for industrial applications, ensuring they can withstand significant wear and tear. Each type serves a unique purpose, so consider your needs when choosing the right one.

Classic Split Rings

When you think about keychain rings, classic split rings are often the go-to option for securing keys and small items.

These rings consist of a loop of metal that splits apart, allowing you to add or remove items easily. They’re durable and reliable, making them ideal for everyday use.

You’ll appreciate their ability to keep your keys organized and accessible. Simply twist the ring to slide your items on or off.

Plus, they come in various sizes and finishes, so you can choose one that fits your style.

Classic split rings are a timeless choice for keychain organization.

Carabiner Clips

While classic split rings are great for everyday use, carabiner clips offer a versatile alternative for securing your keys and gear.

These sturdy clips feature a spring-loaded gate, allowing you to attach and detach items with one hand easily. Whether you’re hiking or camping or need a quick way to clip your keys to a bag, carabiners are perfect.

They come in various sizes and colors, so you can pick one that fits your style. Plus, their durability guarantees they can withstand the elements.

If you want convenience and functionality, adding carabiner clips to your keychain is a smart move.

Lobster Clasps

Lobster clasps are a popular choice for securing keys and accessories due to their reliability and ease of use.

You’ll appreciate how straightforward they’re to operate, thanks to their spring-loaded mechanism. Just pull the lever, and you can quickly attach or detach your items.

These clasps come in various sizes and finishes, allowing you to match them with your style. They’re versatile, whether you’re using them for a keychain, bag, or jewelry.

Plus, their durable construction guarantees that your items stay securely in place. Overall, lobster clasps combine functionality with a touch of elegance for everyday use.

Keychain Chains

Keychains are a fantastic option if you’re looking for a way to enhance your keychain’s functionality.

These versatile chains securely connect multiple items, keeping everything organized and accessible. You can easily attach keys, tools, or charms, allowing you to customize your keychain to fit your needs.

Keychain chains are available in various materials, including metal and nylon, so you can choose one that matches your style. Their flexibility means you can add or remove items effortlessly.

A keychain chain offers improved organization and convenience, making it a smart addition to your everyday carry essentials.

Decorative Keychain Rings

Decorative keychain rings add a personal touch to your everyday carry, making them both functional and stylish.

With countless designs available, you can express your personality or interests—whether it’s a favorite color, a unique shape, or a themed charm. You can easily switch them out to match your mood or outfit, ensuring your keys stand out.

Plus, these rings often feature durable materials, so they’re built to last. When selecting a decorative keychain ring, consider its size and weight, ensuring it’s practical while still showcasing your flair.

Elevate your keychain game and enjoy the compliments that follow!

Flat Embroidery Vs 3d Puff Patches – Everything We Know

Comparing flat embroidery to 3D puff embroidery, we will notice key differences in texture and appearance. Flat embroidery lays seamlessly against the fabric, displaying intricate details clearly. In contrast, 3D puff embroidery creates a raised, puffy effect that adds boldness to your patch design. This dimensionality is perfect for logos or graphics that need to stand out. Understanding these distinct features can help you make the right choice for your projects, and there’s more to explore on this topic.

3D Puff Embroidery Vs. Regular Embroidery

When comparing d puff embroidery to regular embroidery, you’ll notice significant differences in texture and appearance.

3D puff embroidery patches offer a raised, three-dimensional effect that flat embroidery can’t match.

Additionally, while 3D puff direct embroidery provides seamless integration into the fabric, 3D puff patches allow for easier application and removal, making them versatile for various uses.

Surface Vs. Raised EMB Technique

While both flat embroidery patches and 3D puff embroidery patches enhance fabric with intricate designs, they differ greatly in appearance and texture.

Flat embroidery patches lie flat against the fabric, showcasing detailed designs with precision and a smooth finish. This makes them ideal for intricate logos or text that require clarity.

In contrast, 3D puff embroidery patches utilize a foam base, creating a raised effect that adds depth and dimension. This technique is particularly effective for bold designs, as it draws attention and creates a tactile experience.

Ultimately, your choice between flat and 3D puff embroidery patches depends on the desired visual impact and the nature of the design you want to showcase.

Direct Embroidery Vs. 3D Patches

While we are on topic and trying to determine the difference between puffy and flat-run embroidery, it’s a good time to make a quick distinction between direct-to-garment embroidery and embroidery as patches. 

You do not always have to put 3D-raised text/fonts on your hats as patches. You can also get your garment embroidered and ask the embroidery artist to run over your favorite designs directly onto it. 

Reas, here is my blog on the difference between direct embroidery and patches

3D Puff Embroidery For Hats

D puff embroidery for hats offers a unique aesthetic that elevates your headwear game. This technique involves raising the fabric during the embroidery process, creating a three-dimensional effect that captures attention.

With 3d puff embroidery hats, you can showcase bold, intricate designs that stand out from the standard flat embroidery options. The puffed threads provide depth, making logos and graphics visually striking.

When selecting 3d puff embroidery designs, consider how they complement the hat’s style and structure. The material and thickness of the puff can vary, impacting the overall look.

Proper digitization is essential to guarantee that the design stitches out correctly, maintaining the desired elevation and detail. Ultimately, 3d puff embroidery transforms hats into standout fashion statements.

3D Puff Embroidery on Shirts

How can d puff embroidery enhance your shirts? Incorporating 3d puff embroidery on shirts adds a unique, textured dimension that flat embroidery can’t achieve.

The raised design not only catches the eye but also provides a tactile experience, making your shirts stand out in a crowd.

Here are some benefits of using 3d puff embroidery:

  • Creates a bold and striking visual effect
  • Offers a soft, plush feel that’s comfortable against the skin
  • Enhances brand visibility with dynamic logos
  • Allows for intricate designs that maintain clarity
  • Increases durability, resisting wear and tear over time

With the right techniques and materials, you’re well on your way to mastering 3D puff embroidery, which will transform your shirts into eye-catching garments.

3D Puff Embroidery Digitizing

Mastering the digitizing process for 3D puff embroidery is essential for achieving eye-catching designs. It’s a worthwhile investment for any embroidery project.

Being in California, you won’t have to go anywhere else for 3D digitizing. Patches Mania offers great quality embroidery digitizing for 3D logos. You can contact our team for free advice and technical support during business hours.

How To Do 3D Embroidery

Creating 3D puff embroidery involves several key steps that guarantee your designs come out crisp and striking. It begins with using soft rubber foam. By layering the foam beneath the fabric, you can achieve depth and dimension that flat embroidery can’t match. This method works exceptionally well for logos and intricate designs, making them pop. Here is a quick procedure!

First, you’ll need to select the right materials, including high-quality foam and thread. For effective 3D puff embroidery digitizing, particularly in California, it’s essential to use specialized software that can handle the puff effect.

You should then design your artwork, making sure it’s compatible with puff techniques. Once digitized, carefully hoop your fabric, placing the foam underneath the design.

After that, start stitching, allowing the foam to expand and create volume. Regularly check your progress to verify everything is aligned.

Finally, trim any excess foam for a clean finish, ensuring your design pops.

When Should You Need a 3D Digitizing Service?

You will need it for apparel and promotional items. It’s perfect for branding, as it elevates your apparel and gives it a professional look. Plus, 3D puff embroidery is durable, ensuring your designs maintain their appeal even after repeated washes.

What Is the Best Font Using For 3D Puff Embroidery?

Choosing the right font for 3D puff embroidery can considerably enhance the visual impact of your design.

You’ll want to select fonts that can accommodate the texture and height of the puff. Here are some tips on 3D puff embroidery fonts:

  • Bold Styles: Opt for thicker, bold fonts that stand out.
  • Sans Serif: Simple, clean lines guarantee clarity and impact.
  • Limited Details: Avoid overly intricate designs that can lose definition.
  • Rounded Edges: Fonts with rounded edges work well with a puff for a softer look.
  • Legibility: Choose fonts that remain readable from a distance.

What Is the Smallest 3D Puff Hat Possible?

Although smaller designs in 3D puff hat embroidery can present challenges, they also offer unique opportunities for creativity and detail.

When you’re working on the smallest 3D puff hat embroidery, precision is key. Unlike regular embroidery, which lays flat, 3D puff embroidery requires careful consideration of the fabric’s thickness and the puff’s height.

You’ll want to choose high-quality foam to guarantee the design pops without losing detail. Additionally, select a needle and thread that can handle the intricacies of smaller designs.

Keep in mind that while 3D puff adds dimension, it can also obscure fine lines, making it vital to strike a balance between size and clarity.

Experimenting with these elements will help you achieve stunning results.

Tips for Successful 3D Puff Embroidery Projects

Successful 3D puff embroidery projects rely on careful planning and attention to detail.

First, choose the right fabric and backing; a sturdy base will better support the puff. Verify that your digitized design has sufficient underlay stitches to hold the foam in place.

When selecting foam thickness, balance aesthetics and functionality; too thick can distort the design. Test your design on a scrap piece before the final project to check for any adjustments.

Finally, maintain consistent tension while embroidering to avoid puckering.

With these tips, you’ll create stunning, three-dimensional designs that stand out and impress. Happy Puffy stitching!


How to Iron on Patches on Hat

When you want to add a patch to your hat, it’s crucial to start with the right materials and a clear process. You’ll need your patch, an iron, and a thin cloth to protect the fabric. Before you begin, ensure your hat is clean and laid flat, as this will make a difference in the final look. Positioning the patch correctly is key, but there’s a specific technique to make sure it adheres properly. Curious about the steps and tips that can enhance your patch-application skills? Let’s find out the quickest step-by-step execution. 

Collecting Required Materials

Before you begin, it’s essential to gather all your materials.

You’ll need your patches, of course, so pick designs that you love and want to showcase on your hat.

Next, grab a sturdy iron; make sure it’s clean and functional.

You’ll also need an ironing board or a flat surface that can withstand heat.

Remember to bring a piece of cloth, like thin cotton or a pressing cloth, to protect your patch and your hat from direct heat.

Lastly, have a spray bottle filled with water handy, as it can help if you need extra moisture.

Once you have everything ready, you’re set to move on to the next steps in this exciting project!

Getting Ready With A Hat

To ensure a smooth application, start by laying your hat flat on the ironing board. Make sure it’s well-stretched and free of any wrinkles, as this will help the patch adhere properly.

If your hat has a structured brim, avoid placing it directly on the board; instead, use a small towel or a soft cloth underneath to protect it.

Check for any dirt or debris on the surface—clean it gently with a damp cloth if needed.

Once you’ve prepped the hat, it’s a good idea to heat your iron to the appropriate setting for the fabric type. Let it heat up while you double-check that your workspace is clear and ready for the next steps.

Positioning the Patch

Once you’ve prepared your hat, it’s crucial to position the patch carefully where you want it to stay.

Start by laying your hat flat on a clean surface to get a better view. Decide on the exact spot—centered on the front or slightly off to the side—whatever suits your style. Use a measuring tape or ruler for precision if needed.

Once you’ve chosen the spot, hold the patch in place with one hand. Step back and visually assess its alignment before finalizing. If you’re satisfied, you can use a fabric marker to lightly trace around the patch, marking its position.

This will ensure you don’t accidentally shift it during the next steps. Remember, once it’s ironed, it’s set!

Ironing the Patch Onto Hat

With the patch securely positioned and marked, it’s time to iron it onto your hat.

  1. Set your iron to a medium heat setting without steam.
  2. Place a thin cloth or parchment paper over the patch to protect both the patch and the hat.
  3. Firmly press the iron down on the patch for about 15-30 seconds, applying consistent pressure.

Cover the entire patch to ensure even heat distribution. After the time is up, lift the iron and check if the patch has adhered properly. If the edges are still loose, repeat the process.

Once you’re satisfied, remove the cloth, and let the patch cool completely before handling your hat again. You’ve successfully ironed on your patch!

How Can I Use My Favorite Hat for a Long Time?

Caring for your hat is essential to keep it looking fresh and extend its lifespan. If your hat gets wet, reshape it and let it air dry away from direct sunlight to prevent fading. For stubborn stains, spot clean with a mild detergent and a damp cloth, avoiding harsh chemicals.

When storing your hat, use a hat box or a shelf to maintain its shape; don’t crush it under heavy items. If it’s a fabric hat, consider using a lint roller to remove pet hair and lint.

Lastly, excessive folding or bending should be avoided to preserve its structure. With these tips, your hat will stay in great condition for years to come!

Can I Use a Steam Iron for Patches on Hats?

You can use a steam iron for patches, but it’s best to avoid too much steam. Excess moisture can loosen the adhesive. Instead, use a dry heat setting for better results while applying the patches.

What Types of Patches Are Best for Hats?

When choosing patches for hats, consider embroidered or woven patches. They’re durable and add a nice texture. A merrowed edge is recommended.

How Do I Remove a Patch if Needed?

To remove a patch, heat an iron on low, then gently lift the patch with a flat tool. Slowly peel it off, ensuring you don’t damage the fabric. Clean any residue afterward for a neat finish.

Will Ironing Damage My Hat’s Fabric?

Ironing can indeed damage your hat’s fabric, especially if it’s delicate or synthetic. Always check the care label first, and if you’re unsure, consider using a lower heat setting or a protective cloth.

Can I Sew Patches Instead of Ironing Them?

Yes, you can definitely sew patches instead of ironing them. Sewing provides a strong hold, so check out this blog to learn more.


High-Visibility Patches: The Best Choice for Road and Work Safety

High-visibility patches are your best choice for safety on the road and at work. Their bright colors and reflective materials make you stand out in low-light conditions and reduce the risk of accidents by alerting others to your presence. They’re durable, weather-resistant, and easy to apply on various clothing types, gear and vests. By understanding their key features, you can choose the right patches to meet safety standards and improve your safety awareness.

Importance of High-Visibility Patches

When it comes to safety, high-visibility patches play an essential role in ensuring you’re seen in low-light conditions. These patches enhance your visibility, making a significant difference in your safety, especially in environments like roadways or construction sites. Using reflective materials, they catch light and shine brightly, alerting others to your presence. This is vital when you’re working near traffic or in dimly lit areas.

What Color Are Available For Safety Patches?

You’ll find a variety of color options available for high-visibility patches, from bright neon yellows to vibrant oranges. Each color serves a purpose, with some being more effective in certain environments than others. By choosing the right colors, you can further increase your visibility, making it easier for drivers or coworkers to spot you quickly.

What Are Key Applications of Patches?

The use of reflective materials is essential, as they increase your visibility considerably when light hits them. This means that drivers or others in your vicinity can spot you from a distance, reducing the likelihood of accidents. Additionally, high-visibility patches are often durable and weather-resistant, meaning they can withstand the elements while maintaining their effectiveness.

Another benefit is that these patches are easy to apply and can be attached to various garments or safety gear. By incorporating high-visibility patches into your wardrobe, you’re taking an active step toward enhancing your personal safety. Remember, visibility can be the difference between a close call and a serious accident, so investing in high-visibility patches is a smart choice for anyone who values safety.

What Are Suitable Industrial Applications of Patches

In industries like construction and emergency response, high-visibility patches are essential for safety. These patches help guarantee that workers and responders are easily seen, especially in low-light or high-risk situations. By understanding their applications, you can appreciate how they protect lives and prevent accidents on the job.

Construction Site Safety Patches

Construction site safety is everyone’s responsibility, and high-visibility patches play an important role in keeping workers safe across various industries. These patches enhance visibility, helping to prevent accidents related to site hazards. To guarantee safety, it’s vital to adhere to established safety protocols. Here are four key benefits of using high-visibility patches on construction sites:

  1. Increased Visibility: Bright colors and reflective materials make workers easily noticeable, even in low-light conditions.
  2. Accident Prevention: Enhanced visibility reduces the risk of accidents, as equipment operators can better spot workers in their vicinity.
  3. Compliance with Regulations: Many industries require high-visibility clothing as part of safety protocols, making sure you meet legal standards.
  4. Improved Team Communication: When everyone wears high-visibility patches, it fosters a sense of unity and awareness among the team, making it easier to coordinate tasks safely.

Emergency Response Visibility

Emergency responders often face chaotic situations where visibility is fundamental for safety and effectiveness. When you’re out there during emergencies, especially at night, your ability to be seen can mean the difference between life and death. High-visibility patches made from reflective materials play a significant role in enhancing nighttime visibility. These patches reflect light from vehicles and flashlights, making it easier for others to spot you in low-light conditions.

In various industries, including firefighting, medical emergencies, and search-and-rescue operations, the importance of visibility cannot be overstated. Wearing gear with high-visibility patches helps guarantee that you stand out against dark backgrounds, reducing the risk of accidents. This visibility is essential not only for your safety but also for the safety of your team and the public.

Moreover, reflective materials can be integrated into uniforms, vests, and helmets, providing a thorough safety solution. Understanding the significance of these materials can empower you to make informed choices in emergency response situations. Always prioritize visibility, as it’s a fundamental aspect of your protective gear, enabling you to carry out your duties effectively and safely. Remember, in emergencies, being seen is just as important as being prepared.

Future of Glowing Patches and Innovations in Visibility Technology

Visibility technology has come a long way, revolutionizing how we enhance safety in various environments. Innovations in this field focus on improving reflective materials and color optimization, making high-visibility patches more effective than ever. As you consider your safety gear, it’s essential to stay informed about these advancements.

Here are some key innovations to note:

  1. Enhanced Reflective Materials: New technologies allow for more efficient light reflection, ensuring you’re seen from greater distances.
  2. Color Optimization: Researchers are developing colors that stand out in various lighting conditions, increasing visibility during day and night.
  3. Adaptive Fabrics: Some fabrics can change color based on environmental factors, offering dynamic visibility adjustments as conditions shift.
  4. Integrated Technology: Smart patches now incorporate LED lights or sensors that enhance visibility and alert others to your presence.

How To Choose A Perfect Patch?

First, consider the patch materials. Look for durable fabrics that can withstand harsh conditions, like reflective polyester or vinyl, which can enhance visibility in low light.

Next, think about patch designs. Opt for those that feature bright colors and reflective elements, as these designs greatly increase your visibility to others. Patches with bold patterns or retroreflective strips can make a real difference in how easily you’re seen, especially in high-risk environments.

Moreover, make sure the patches can be securely attached to your clothing or gear. The more stable the attachment, the less likely it is to come loose during your activities.

Ultimately, the right combination of patch materials and designs can enhance your safety on the job or while out on the road. By choosing wisely, you’re taking an important step in protecting yourself and ensuring you’re visible to those around you.

Difference Between Sew on and Iron on Custom Patches

When it comes to custom patches, you might find yourself wondering about the differences between sew-on and iron-on options. While both serve the purpose of adding style or identity to your garments, their application methods and durability vary significantly. Sew-on patches create a solid, long-lasting attachment through stitching, while iron-on patches offer a quick, heat-activated solution for those lacking sewing skills. However, this convenience comes with its own set of limitations, and understanding these nuances can help you make an informed choice for your needs. What factors will ultimately influence your decision?

Overview of Custom Patches

Custom patches come in various shapes, sizes, and styles, allowing you to express your unique personality. Whether you’re personalizing a jacket, bag, or hat, patches offer a creative way to showcase your interests or affiliations.

You can choose from embroidered, woven, or printed designs, each providing a distinct look and feel. Additionally, custom patches can serve practical purposes, like covering holes or stains, while adding flair.

They’re also an excellent way to promote a brand, event, or team. With endless possibilities, custom patches make it easy to transform ordinary items into something special and eye-catching.

Understanding Sew On Patches

Sew-on patches bring a classic and durable option for customizing your garments. When you choose this method, you’re ensuring that your patches stay securely attached, even after multiple washes.

Unlike iron-on patches, which can peel off over time, sew on patches are stitched directly to the fabric, providing a lasting bond. To apply them, all you need is a needle and thread. You can either sew them by hand or use a sewing machine for faster application.

Plus, with a variety of colors and designs available, you can make your clothing truly unique. This option is perfect for anyone looking to add a personal touch or repair worn items, giving them new life and character.

Exploring Iron On Patches

In recent years, iron-on patches have gained popularity for their convenience and ease of use. You can apply them quickly without needing sewing skills, making them ideal for quick repairs or personalizing items.

Place the patch on the desired fabric, cover it with a cloth, and apply heat with an iron for a few seconds. This process activates the adhesive backing, bonding the patch securely to the fabric.

Iron-on patches come in various designs, sizes, and colors, allowing you to express your style or commemorate special events. They’re great for clothing, bags, and even home decor.

Just remember to follow care instructions to ensure the patch stays in place after multiple washes.

Advantages and Disadvantages

Each method of attaching patches—sew-on and iron-on—comes with its own set of advantages and disadvantages.

Sew-on patches are typically more durable, making them ideal for heavy use or washing. You won’t have to worry about them peeling off over time. However, sewing can be time-consuming and requires some skill.

On the flip side, iron-on patches offer quick application and are great for those who don’t sew. They stick well to fabric, but they may not hold up as effectively in the wash or under heavy wear.

If you’re looking for ease, iron-ons are convenient, but if you prioritize longevity, sew-ons might be your best bet. Consider what matters most in your specific situation.

Choosing the Right Patch Type

When deciding on the right patch for your project, consider the fabric type and the intended use. If you’re working with heavier materials like denim or canvas, sew-on patches often provide better durability.

Iron-on patches, however, are perfect for lighter fabrics such as t-shirts or cotton, where ease of application is key.

Think about how often the item will be washed or worn. If it’s a frequent-use item, like a jacket, sewing on the patch might be your best bet for longevity.

For quick fixes or temporary designs, iron-on patches are convenient and time-saving.

Finally, consider the design and size; some patches are better suited for specific applications, so choose one that complements your project’s overall look.

Can I Wash Garments With Iron on Patches?

Yes, you can wash garments with iron-on patches, but it’s best to turn them inside out and use cold water.

Avoid high heat when drying to ensure the patches stay securely attached and intact.

Do Sew on Patches Require Special Thread?

Sew on patches don’t necessarily require special thread, but using a strong, durable thread helps ensure they stay secure.

Choose a color that matches your patch or garment for a seamless look.

How Long Do Patches Usually Last?

Patches usually last several years, depending on wear and care.

If you handle them gently and wash items properly, you’ll extend their lifespan.

Can I Remove Iron on Patches Easily?

Yes, you can remove iron-on patches relatively easily. Just heat the patch with an iron briefly, then gently peel it off.

Are There Size Limitations for Custom Patches?

Yes, there are size limitations for custom patches.

Most manufacturers offer a range of sizes, but if you want something specific, you should check with them first to ensure it fits your design needs.

CONCLUSION

In conclusion, choosing between sew-on and iron-on custom patches depends on your needs. If you’re looking for durability and a strong bond for heavy use, sew-ons are the way to go. However, if convenience and ease of application are your priorities, iron-ons offer a quick solution. Think about how you plan to use your patches and what materials you’re applying them to, and you’ll be able to make the best choice for your projects.


How Glowing Patches Work: A Look at Phosphorescent Threads

Glow-in-the-dark patches work through phosphorescent threads, typically made from materials like zinc sulfide and strontium aluminate. These materials absorb light energy, especially from UV sources, and then gradually release it, creating that glowing effect. When you expose these patches to bright light, electrons within the materials get excited and store energy. They release this energy slowly when it’s dark, enabling the glow. Various factors affect the intensity and duration of the glow, so make sure to check product details for quality. Understanding these mechanics is essential if you want ideal performance from glow-in-the-dark items.

What Are Phosphorescent Threads?

Phosphorescent threads are the secret behind those enchanting glow-in-the-dark patches you see on clothing and gear. These innovative materials harness the unique properties of phosphorescent materials, which absorb light and then release it slowly over time. When you expose these threads to a light source, they soak up energy, storing it like a battery. Once the lights go out, the stored energy is gradually released, creating the mesmerizing glow you admire.

What Are the Material Properties of Glowing Patches?

The glow properties of phosphorescent threads depend on the specific materials used in their composition. Common phosphorescent materials include zinc sulfide and strontium aluminate, both known for their ability to emit light for extended periods. However, not all phosphorescent threads are created equal; some may glow brightly but for a shorter duration, while others may emit a softer light for longer.

The Science of Light Absorption

Light absorption is a fascinating process that plays an integral role in how glow-in-the-dark patches function. When you expose these patches to light, they interact with light properties in remarkable ways. The threads contain phosphorescent materials, which are specifically designed to absorb photons—the tiny packets of light energy. This interaction is essential, as photon absorption allows the materials to store energy temporarily.

As the light hits the patch, its energy excites the electrons in the phosphorescent threads, pushing them to a higher energy state. Think of it like charging a battery. However, this process doesn’t happen without limitations. Not all light is absorbed equally; certain wavelengths are more effective than others. For example, ultraviolet (UV) light is particularly efficient at charging these patches, while visible light might not charge them as effectively.

Understanding light absorption is critical, especially when using glow-in-the-dark patches. If you want them to glow brightly and for an extended period, you need to guarantee they’re exposed to the right kind of light for adequate photon absorption. Otherwise, their effectiveness diminishes, and you won’t achieve the glow you expect.

Applications of Glow-in-the-Dark Patches

Glow-in-the-dark patches have found a variety of innovative applications across different fields. You might be surprised to see how these patches blend fashion trends with vital safety features. For instance, they’re commonly used in children’s clothing, helping parents spot their kids in low-light situations. In sportswear, these patches enhance visibility during evening runs, ensuring that athletes stay safe.

Here’s a closer look at some key applications:

Application Area

Example Use

Benefits

Fashion

Glow-in-the-dark apparel

Trendy and eye-catching designs

Safety Gear

Work uniforms

Increased visibility for workers

Home Decor

Wall stickers

Unique nighttime aesthetics

Emergency Equipment

First aid kits

Quick identification in the dark

Personal Accessories

Bags and backpacks

Added safety for night outings

As you can see, glow-in-the-dark patches aren’t just fun; they serve vital roles in safety and style. Whether you’re dressing up for a party or ensuring your child’s safety, these patches offer practical solutions and keep you informed about potential hazards.

Step-by-Step Guide to Using Iron-On DIY Patch Kits

To effectively use an iron-on DIY patch kit, begin by having a look inside patch kit items. Selecting a patch that matches the material and color of the garment, guaranteeing compatibility for best results. By organizing the necessary tools and the caring use, I will make each segment super easy for you.

Before we start this guide, let’s explore what items we are supposed to utilize inside the DIY Kit of Ironing.  

5 Key Items Inside Patch Kit

The kit should include a variety of items, such as;

  1. Patches: these can range from simple, color-matched fabric squares to elaborate designs
  2. An Iron: is important for applying most iron-on custom patches.
  3. Ironing Board: or a flat and sturdy heat-resistant surface also plays a role in this process.
  4. Parchment Paper: or a thin cloth to maintain the quality and avoid damage.
  5. Sharp Scissors: for trimming excess material or tweezers for precise placement and adjustment.

Remember to gather these tools in advance to streamline your patching process. This preparation not only saves time but also enhances the outcome of your repair.

Selecting the Correct Patch Type

Selecting the right patch is an important first step in any DIY repair kit project. Understanding the variety of patch material types and staying updated with patch design trends are vital. Common materials include denim, leather, and synthetic fabrics, each with distinct qualities. Denim patches offer durability and ease of sewing, making them ideal for casual wear repairs. Leather patches add a luxurious and sturdy touch but require specific tools for application.

Combo of Patch and Placement

It’s important to reflect on the garment’s use and the match between the patch material and the clothing fabric. For instance, a heavy leather patch might not be suitable for a lightweight cotton t-shirt. Additionally, the trend of using recycled materials for patches not only supports sustainability but also adds a unique story to your DIY project.

Preparing Workspace Once for All

It’s time to move practical stuff. But wait; to guarantee an efficient and effective patching session, preparing your workspace with the necessary materials is vital.

Start by clearing any clutter from the area where you will work. A clean, flat surface is essential for laying out fabrics and applying patches without interference.

Verify that the lighting is adequate, which will help align the patches precisely and spot any uneven edges or potential fabric snags.

Arrange all the tools and materials you need in a logical order within easy reach.

Consider the placement of your ironing board. It should be set at a comfortable height to avoid strain on your back or arms, enhancing both safety and comfort as you work.

Step 1. Preparing the Target Fabric

Proper preparation of target fabric is vital to guarantee the patch adheres well and lasts long. It is essential to confirm that the material is clean and free from any oils or dirt that could affect the adhesion of the patch.

Different types of fabrics require specific attention. For instance, cotton and linens can typically be machine washed and dried before application, while more delicate fabrics like silk or wool might need dry cleaning or gentle hand washing.

Here’s a quick guide on how to prepare various fabric types:

Fabric Type

Cleaning Method

Drying Method

Cotton

Machine wash warm

Tumble dry low

Linen

Machine wash gentle

Air dry

Silk

Hand wash or dry clean only

Lay flat to dry

Wool

Dry clean or cool hand wash

Lay flat to dry

Step 2. Positioning the Patch for Heat Stick

Once the fabric is prepared and ready, correctly positioning the patch becomes the next important step. Effective patch placement strategies guarantee that the patch both looks good and adheres properly.

Here are key steps to follow:

  1. Identify the Ideal Location: Depending on the purpose of the patch (decorative, to cover a tear, etc.), choose a spot where it will be most effective or visually appealing. Confirm the surface is flat and smooth.
  2. Use Measuring Tools: For precise placement, use a ruler or measuring tape to center the patch. This prevents skewing and helps maintain uniformity, especially when applying multiple patches.
  3. Mark the Position: Lightly mark the fabric with a fabric pencil where the edges of the patch will be. This acts as a guideline and helps in accurate placement before ironing.
  4. Check Alignment: Before finalizing the position, step back and examine the patch from different angles to confirm it’s visually balanced. Adjust as needed before proceeding to the next steps.

These steps help in achieving a professional and durable application, enhancing both the functionality and style of the fabric.

Step 3. Setting Up the Iron and Temperature

Before you begin the application of your DIY patch, it is critical to set up your iron properly. Different materials will require different heat settings.  Understanding the relationship between temperature settings and material types is vital in this process.

Here’s a guide to help you navigate these settings effectively:

  1. Cotton and Linen: Set your iron to a high temperature, typically between 140°C to 200°C. These fabrics can withstand more heat, which is necessary for the patches to adhere properly.
  2. Wool and Silk: Use a medium temperature setting, generally around 100°C to 140°C. These materials require a gentler approach to avoid scorching or damaging the delicate fibers.
  3. Polyester and Nylon: Select a lower temperature, about 90°C to 130°C. High temperatures can melt these synthetic fabrics, creating an unsightly finish.
  4. Leather and Suede: Opt for medium heat, and always apply heat from the back. You would need to turn the inside part out, and do not forget to stick the patch from the front temporarily- Use a paper tap for this purpose.


Additionally, it is important to clean the surface of the iron to confirm no residue or dirt transfers onto the fabric during the pressing process.

 Step 4. Cleaning the Iron Surface

This is vital for both heat press machines and for home use dry iron. You should clean the surface in both cases. Any leftover sticky substances or dirt on the iron can transfer to the fabric and ruin both the patch and the garment.

First, make sure the iron is unplugged and cool. Wipe the surface with a soft, damp cloth to remove any dust or lint.

If stubborn residues persist, use a specialized iron cleaner as per the manufacturer’s instructions, but avoid abrasive materials that could scratch the iron surface. Understanding the iron surface types is important here.

Stainless steel surfaces are generally more resilient against scratches compared to ceramic or non-stick coatings, which require gentler handling.

Step 5. Applying the Patch

Applying the process requires careful attention to detail, particularly in the placement and initial adhesion of the patch. Before beginning, verify your iron surface is prepped as discussed in the previous section.

Here are some essential steps to follow:

  1. Choose the Patch: Select a patch that complements the fabric in both texture and color. Consider patch design ideas that either blend in or stand out based on the desired aesthetic effect.
  2. Positioning: Patch placement tips include aligning the patch precisely where you want it. It should cover the entire area of the tear or design flaw seamlessly.
  3. Secure Temporarily: Use small pieces of heat-resistant tape to hold the patch in place, preventing it from shifting during the application.
  4. Check Alignment: Before applying heat, double-check the placement. Misalignment can lead to uneven attachment and an unprofessional appearance.

Step 6. Using Safety Layer/Parchment Paper

Place a thin, pressing cloth or a piece of parchment paper over the patch to protect both the fabric’s surface and the patch from direct heat, which can cause scorching or melting. Press the iron firmly down onto the patch and hold it in place without moving it to maintain steady pressure. This pressure application is vital as it helps the adhesive on the patch to activate and bond securely with the fabric.

Step. 7 Pressing Techniques

It is essential to select the right pressing methods and to apply consistent pressure during this process. Begin by setting your iron to the temperature recommended by the patch manufacturer, usually found in the instructions that accompany the kit.

Continue to apply pressure for the amount of time specified in the patch instructions, typically between 15 to 30 seconds. Avoid lifting the iron repeatedly as this can weaken the bond being formed. Instead, if the area is large, lift the iron and place it on the next section, ensuring every part of the patch has been evenly heated and pressed.

Cooling and Checking

Once you have completed the pressing process, it’s important to let the garment rest undisturbed. This stage is vital to guarantee that the patch is securely attached and that the adhesive has properly melted and bonded.

As you enter the cooling process, consider these cooling techniques and check the adhesion steps:

  1. Do Not Disturb: Allow the patch to cool completely without moving the garment. This can take a few minutes, depending on the fabric and the size of the patch.
  2. Check Edges: Gently peel up the edges of the patch to check if it is securely adhered. If the edges lift, additional heat may be required.
  3. Even Cooling: Make sure the garment is laid flat in a cool, dry area away from direct heat sources to avoid uneven cooling, which can impact adhesion.
  4. Re-Press if Necessary: If after cooling, the patch hasn’t fully adhered, cover it with a pressing cloth again and apply heat for another 10-15 seconds.

  Now that we have learned the steps and all the key steps let me tell you about some common issues you might face during the procedure.

Troubleshooting Common Issues

When using DIY iron-on patch kits, achieving strong patch adhesion can sometimes be challenging. To troubleshoot this common issue, several factors need to be considered. Here are key troubleshooting tips to guarantee your patch adheres securely:

  1. Fabric Compatibility: Some fabrics are not suitable for iron-on patches. Materials like nylon, silk, and waterproof fabrics can prevent patches from sticking effectively. Always check the fabric compatibility listed on the patch kit.
  2. Adhesive Quality: The quality of the adhesive on the patch plays a vital role. If the adhesive layer is too thin or uneven, it might not melt properly, leading to poor adhesion. Confirm the patch’s adhesive is intact and evenly distributed.
  3. Pre-application Fabric Treatment: Fabrics that are dirty or have residues like oils or fabric softeners can hinder adhesion. Clean the area where the patch will be applied thoroughly, and make sure it is dry.
  4. Pressure During Application: Applying sufficient pressure is essential for the adhesive to activate and bond. Make sure to press down firmly with the iron, according to the instructions in the kit.

Understanding these aspects will greatly improve your success with DIY patch kits. Hope this blog will help by and large; feel free to contact Team Patches Mania for free advice.


How Thermal Adhesives Work in Custom Heat-Transfer Patches

Thermal adhesive is essential for creating strong and durable bonds in heat press custom patches. When you apply heat, it activates and bonds the patch to the fabric securely. After cooling, it guarantees the patch withstands washes and everyday wear. Using the right temperature and pressure is key to activating the adhesive properly. This versatile method can enhance your projects, whether for garments or accessories. Stick around to discover more tips and tricks for effective application!

Understanding Thermal Adhesive and Its Composition

Thermal adhesive is an essential component in the world of custom patches, providing the necessary bond between the fabric and the patch itself.

Understanding its composition is key to appreciating its effectiveness. Typically, thermal adhesives are made from polymer-based materials that activate when heat is applied. These polymers create a strong, durable bond once cooled.

You’ll find various types, including polyurethane and EVA, each offering unique properties. When choosing an adhesive, consider factors like flexibility, temperature resistance, and washability.

The Heat Press Method: How Thermal Adhesive Works

When you apply heat through the heat press method, the thermal adhesive activates, bonding the patch to the fabric. The heat causes the adhesive to melt slightly, creating a strong bond as it cools.

You’ll need to guarantee the temperature and pressure are just right; too low won’t activate the adhesive, while too high can damage the patch.

Once you’ve pressed down, let it cool before lifting the press. This process seals the edges, preventing fraying and enhancing durability.

Proper application guarantees your custom patch stays securely attached, providing the look and quality you desire for your fabric item.

Advantages of Using Thermal Adhesive for Custom Patches

Using thermal adhesive for custom patches offers several significant advantages that can enhance your projects.

First, it provides a strong bond, ensuring your patches stay securely attached, even through washes.

You’ll also appreciate the ease of application; just heat it up, press, and you’re done!

Thermal adhesive is versatile, compatible with various fabrics, and works well with intricate designs.

Plus, it’s lightweight, which means it won’t add bulk to your garments.

Finally, it’s cost-effective, allowing you to create stunning patches without breaking the bank.

With these benefits, you’ll find thermal adhesive an essential tool for your custom patch creations.

Tips for Applying Thermal Adhesive Effectively

Preparation is key to achieving the best results with thermal adhesive for your custom patches. First, verify your fabric is clean and dry to promote strong adhesion.

Cut the adhesive to match your patch precisely, then position it carefully. Use a heat press set to the recommended temperature and pressure for your materials.

Place a protective sheet over the patch to avoid direct contact with the heat source. Apply consistent pressure for the specified time, then let it cool before handling.

Finally, check the edges to confirm the adhesive has bonded securely. Following these tips will enhance durability and appearance.

Common Applications of Thermal Adhesive in Embroidery and Fabric Decoration

Thermal adhesive plays an essential role in various applications of embroidery and fabric decoration, making it a favourite among crafters and professionals alike.

You can use it to secure patches, appliqués, and embellishments, ensuring they stay in place even after repeated washes. It’s perfect for creating custom designs on garments, bags, and home textiles, giving your projects a polished look.

Thermal adhesive’s versatility allows you to bond different fabric types seamlessly, enhancing creativity in your work. Plus, it simplifies the application process, saving you time and effort while achieving durable results that withstand everyday wear.

Can Thermal Adhesive Be Used on All Fabric Types?

You can’t use thermal adhesive on all fabric types. It’s best for materials like cotton and polyester, but it may not adhere well to delicate fabrics or those with a high nylon content.

Always check compatibility first.

How Long Does Thermal Adhesive Last on Patches?

Thermal adhesive typically lasts several years on patches, especially with proper care. If you maintain your garments and avoid harsh conditions, you’ll extend the adhesive’s lifespan, ensuring your patches stay securely attached for longer.

Is Thermal Adhesive Safe for Children’s Clothing?

Yes, thermal adhesive is generally safe for children’s clothing. It’s non-toxic and designed for fabric use.

Just verify you follow the manufacturer’s instructions for application and washing to maintain safety and durability.

Can I Remove Thermal Adhesive From Fabric?

Yes, you can remove thermal adhesive from fabric. Try using heat to soften it, then gently scrape it off.

Alternatively, a solvent like rubbing alcohol can help break down the adhesive for easier removal.

What Temperature Is Ideal for Applying Thermal Adhesive?

The ideal temperature for applying thermal adhesive usually ranges from 250°F to 350°F.

Always check the manufacturer’s instructions, as different adhesives may require varying temperatures for best bonding and effectiveness during your application process.