Doing It Yourself for custom patches. A whole concept of finest patch kits and making.

Step-by-Step Guide to Using Iron-On DIY Patch Kits

To effectively use an iron-on DIY patch kit, begin by having a look inside patch kit items. Selecting a patch that matches the material and color of the garment, guaranteeing compatibility for best results. By organizing the necessary tools and the caring use, I will make each segment super easy for you.

Before we start this guide, let’s explore what items we are supposed to utilize inside the DIY Kit of Ironing.  

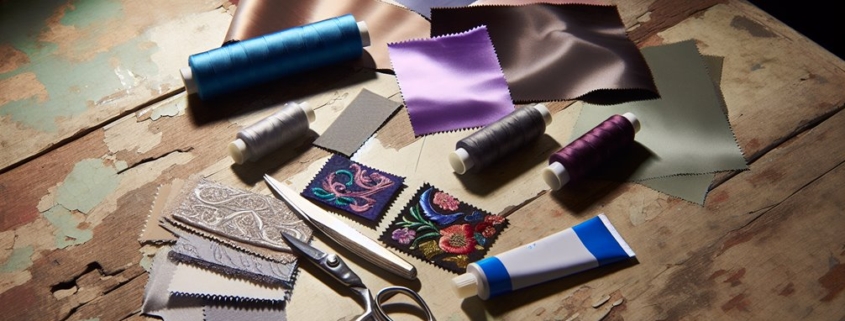
5 Key Items Inside Patch Kit

The kit should include a variety of items, such as;

  1. Patches: these can range from simple, color-matched fabric squares to elaborate designs
  2. An Iron: is important for applying most iron-on custom patches.
  3. Ironing Board: or a flat and sturdy heat-resistant surface also plays a role in this process.
  4. Parchment Paper: or a thin cloth to maintain the quality and avoid damage.
  5. Sharp Scissors: for trimming excess material or tweezers for precise placement and adjustment.

Remember to gather these tools in advance to streamline your patching process. This preparation not only saves time but also enhances the outcome of your repair.

Selecting the Correct Patch Type

Selecting the right patch is an important first step in any DIY repair kit project. Understanding the variety of patch material types and staying updated with patch design trends are vital. Common materials include denim, leather, and synthetic fabrics, each with distinct qualities. Denim patches offer durability and ease of sewing, making them ideal for casual wear repairs. Leather patches add a luxurious and sturdy touch but require specific tools for application.

Combo of Patch and Placement

It’s important to reflect on the garment’s use and the match between the patch material and the clothing fabric. For instance, a heavy leather patch might not be suitable for a lightweight cotton t-shirt. Additionally, the trend of using recycled materials for patches not only supports sustainability but also adds a unique story to your DIY project.

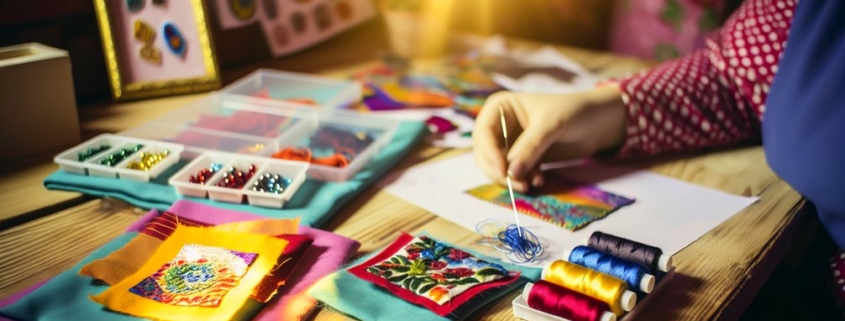
Preparing Workspace Once for All

It’s time to move practical stuff. But wait; to guarantee an efficient and effective patching session, preparing your workspace with the necessary materials is vital.

Start by clearing any clutter from the area where you will work. A clean, flat surface is essential for laying out fabrics and applying patches without interference.

Verify that the lighting is adequate, which will help align the patches precisely and spot any uneven edges or potential fabric snags.

Arrange all the tools and materials you need in a logical order within easy reach.

Consider the placement of your ironing board. It should be set at a comfortable height to avoid strain on your back or arms, enhancing both safety and comfort as you work.

Step 1. Preparing the Target Fabric

Proper preparation of target fabric is vital to guarantee the patch adheres well and lasts long. It is essential to confirm that the material is clean and free from any oils or dirt that could affect the adhesion of the patch.

Different types of fabrics require specific attention. For instance, cotton and linens can typically be machine washed and dried before application, while more delicate fabrics like silk or wool might need dry cleaning or gentle hand washing.

Here’s a quick guide on how to prepare various fabric types:

Fabric Type

Cleaning Method

Drying Method

Cotton

Machine wash warm

Tumble dry low

Linen

Machine wash gentle

Air dry

Silk

Hand wash or dry clean only

Lay flat to dry

Wool

Dry clean or cool hand wash

Lay flat to dry

Step 2. Positioning the Patch for Heat Stick

Once the fabric is prepared and ready, correctly positioning the patch becomes the next important step. Effective patch placement strategies guarantee that the patch both looks good and adheres properly.

Here are key steps to follow:

  1. Identify the Ideal Location: Depending on the purpose of the patch (decorative, to cover a tear, etc.), choose a spot where it will be most effective or visually appealing. Confirm the surface is flat and smooth.
  2. Use Measuring Tools: For precise placement, use a ruler or measuring tape to center the patch. This prevents skewing and helps maintain uniformity, especially when applying multiple patches.
  3. Mark the Position: Lightly mark the fabric with a fabric pencil where the edges of the patch will be. This acts as a guideline and helps in accurate placement before ironing.
  4. Check Alignment: Before finalizing the position, step back and examine the patch from different angles to confirm it’s visually balanced. Adjust as needed before proceeding to the next steps.

These steps help in achieving a professional and durable application, enhancing both the functionality and style of the fabric.

Step 3. Setting Up the Iron and Temperature

Before you begin the application of your DIY patch, it is critical to set up your iron properly. Different materials will require different heat settings.  Understanding the relationship between temperature settings and material types is vital in this process.

Here’s a guide to help you navigate these settings effectively:

  1. Cotton and Linen: Set your iron to a high temperature, typically between 140°C to 200°C. These fabrics can withstand more heat, which is necessary for the patches to adhere properly.
  2. Wool and Silk: Use a medium temperature setting, generally around 100°C to 140°C. These materials require a gentler approach to avoid scorching or damaging the delicate fibers.
  3. Polyester and Nylon: Select a lower temperature, about 90°C to 130°C. High temperatures can melt these synthetic fabrics, creating an unsightly finish.
  4. Leather and Suede: Opt for medium heat, and always apply heat from the back. You would need to turn the inside part out, and do not forget to stick the patch from the front temporarily- Use a paper tap for this purpose.


Additionally, it is important to clean the surface of the iron to confirm no residue or dirt transfers onto the fabric during the pressing process.

 Step 4. Cleaning the Iron Surface

This is vital for both heat press machines and for home use dry iron. You should clean the surface in both cases. Any leftover sticky substances or dirt on the iron can transfer to the fabric and ruin both the patch and the garment.

First, make sure the iron is unplugged and cool. Wipe the surface with a soft, damp cloth to remove any dust or lint.

If stubborn residues persist, use a specialized iron cleaner as per the manufacturer’s instructions, but avoid abrasive materials that could scratch the iron surface. Understanding the iron surface types is important here.

Stainless steel surfaces are generally more resilient against scratches compared to ceramic or non-stick coatings, which require gentler handling.

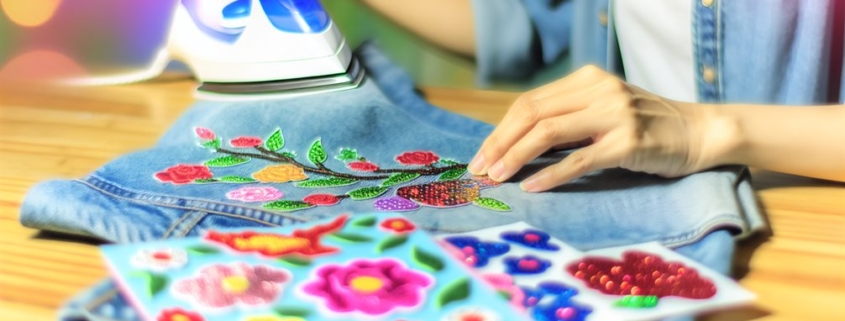
Step 5. Applying the Patch

Applying the process requires careful attention to detail, particularly in the placement and initial adhesion of the patch. Before beginning, verify your iron surface is prepped as discussed in the previous section.

Here are some essential steps to follow:

  1. Choose the Patch: Select a patch that complements the fabric in both texture and color. Consider patch design ideas that either blend in or stand out based on the desired aesthetic effect.
  2. Positioning: Patch placement tips include aligning the patch precisely where you want it. It should cover the entire area of the tear or design flaw seamlessly.
  3. Secure Temporarily: Use small pieces of heat-resistant tape to hold the patch in place, preventing it from shifting during the application.
  4. Check Alignment: Before applying heat, double-check the placement. Misalignment can lead to uneven attachment and an unprofessional appearance.

Step 6. Using Safety Layer/Parchment Paper

Place a thin, pressing cloth or a piece of parchment paper over the patch to protect both the fabric’s surface and the patch from direct heat, which can cause scorching or melting. Press the iron firmly down onto the patch and hold it in place without moving it to maintain steady pressure. This pressure application is vital as it helps the adhesive on the patch to activate and bond securely with the fabric.

Step. 7 Pressing Techniques

It is essential to select the right pressing methods and to apply consistent pressure during this process. Begin by setting your iron to the temperature recommended by the patch manufacturer, usually found in the instructions that accompany the kit.

Continue to apply pressure for the amount of time specified in the patch instructions, typically between 15 to 30 seconds. Avoid lifting the iron repeatedly as this can weaken the bond being formed. Instead, if the area is large, lift the iron and place it on the next section, ensuring every part of the patch has been evenly heated and pressed.

Cooling and Checking

Once you have completed the pressing process, it’s important to let the garment rest undisturbed. This stage is vital to guarantee that the patch is securely attached and that the adhesive has properly melted and bonded.

As you enter the cooling process, consider these cooling techniques and check the adhesion steps:

  1. Do Not Disturb: Allow the patch to cool completely without moving the garment. This can take a few minutes, depending on the fabric and the size of the patch.
  2. Check Edges: Gently peel up the edges of the patch to check if it is securely adhered. If the edges lift, additional heat may be required.
  3. Even Cooling: Make sure the garment is laid flat in a cool, dry area away from direct heat sources to avoid uneven cooling, which can impact adhesion.
  4. Re-Press if Necessary: If after cooling, the patch hasn’t fully adhered, cover it with a pressing cloth again and apply heat for another 10-15 seconds.

  Now that we have learned the steps and all the key steps let me tell you about some common issues you might face during the procedure.

Troubleshooting Common Issues

When using DIY iron-on patch kits, achieving strong patch adhesion can sometimes be challenging. To troubleshoot this common issue, several factors need to be considered. Here are key troubleshooting tips to guarantee your patch adheres securely:

  1. Fabric Compatibility: Some fabrics are not suitable for iron-on patches. Materials like nylon, silk, and waterproof fabrics can prevent patches from sticking effectively. Always check the fabric compatibility listed on the patch kit.
  2. Adhesive Quality: The quality of the adhesive on the patch plays a vital role. If the adhesive layer is too thin or uneven, it might not melt properly, leading to poor adhesion. Confirm the patch’s adhesive is intact and evenly distributed.
  3. Pre-application Fabric Treatment: Fabrics that are dirty or have residues like oils or fabric softeners can hinder adhesion. Clean the area where the patch will be applied thoroughly, and make sure it is dry.
  4. Pressure During Application: Applying sufficient pressure is essential for the adhesive to activate and bond. Make sure to press down firmly with the iron, according to the instructions in the kit.

Understanding these aspects will greatly improve your success with DIY patch kits. Hope this blog will help by and large; feel free to contact Team Patches Mania for free advice.


Best Patch Materials for DIY Projects

For DIY projects, choosing patch materials can make or break your repair efforts. If you are creating your own patch, the material still plays a key role. Consider fabric patches for clothing, especially iron-on types that require no sewing. Understanding these materials guarantees successful repairs, guiding you to further practical insights.

List of Best Patch Materials for DIY EMB Projects

Cotton: fabric offers a versatile and aesthetically pleasing solution for many DIY projects, ranging from clothing repairs to decorative applications. It is a sewing-friendly commercial embroidery machine.

Polyester: is super resistant to fading. this feature makes polyester top choice items subjected to frequent wear like clothing patches.

Denim: really stands out as a versatile choice. They come in various colors and styles, allowing you to customize your clothing to match your personal flair.

Canvas: is a great choice material for everyday wear patches, but the thickness of canvas fabric varies according to personalization needs.

Silk is a delicate fabric and another great fabric type as a DIY project material. Silk can add a touch of elegance.

Adhesive kits: come with self-adhesive backing that bonds securely to a wide range of surfaces, including a vast range of fabric types and custom patches.

Vinyl: can revamp your favorite bag and accessories. It can revalue furniture to its original charm. 

Leather: is the best use case for regular jackets and leather-made jackets. With vast functionality under clothing items, it shares big margins for DIY projects.

Best Materials and Patches – Head-to-Head

Patches made of cotton twill not only extend the life of beloved garments but also provide a creative outlet for personal expression. Among the most popular types are iron-on patches, which simplify the application process considerably. By using heat and pressure, these patches adhere securely to fabric surfaces, eliminating the need for sewing skills and ensuring a polished finish. This ease of use makes them particularly attractive to beginners and those seeking quick solutions.

Decorative patches, on the other hand, serve as an artistic medium to personalize clothing and accessories. With countless designs available—from vintage motifs to contemporary art—these patches allow individuals to showcase their unique style effortlessly. It’s important to select quality fabric patches that complement the material of the item being adorned, ensuring durability and a cohesive appearance.


How to Create Your Own Patches With DIY Kits

Creating your own patches with DIY kits requires a strategic approach. Start by selecting a kit that includes durable fabric, like cotton, and offers customization options such as varied thread colors and embellishments. Confirm your workspace is well-lit and organized with essential tools like fabric scissors and a cutting mat for precision. Then, focus on transferring your design onto the fabric, using techniques such as the backstitch or satin stitch for detailing. After completing the embroidery, choose your attachment method; heat-activated adhesives or sewing offer varying degrees of permanence. With these steps, you’ll create professional and personalized patches. Continue onward for further insights. Here are 5 prerequisites to get started.

1 – Fabric Selection

Evaluate fabric types in DIY kits, considering durability and application ease, to ensure a suitable base for your patch.

2 – Patch Sizing

Select patch dimensions that fit your design and intended application area for optimal results.

3 – Adding Personalization

Customize your patch using kits that offer various threads and embellishments for personal touches.

4 – Preparing Material

Prepare your workspace with the necessary materials and tools, ensuring a distraction-free, well-lit environment for patch creation.

5 – Stitching Technique

Use appropriate stitching techniques to secure your patch, offering durability and a polished finish.

Choosing the Right DIY Kit

Selecting the appropriate DIY kit is a vital first step in guaranteeing the success of your patch-making project. The right kit features can notably impact your creative journey, making it essential to understand the various elements involved. When evaluating fabric types, consider durability and ease of application. Common options include cotton and polyester, each offering unique benefits and requiring different handling techniques. Patch sizes vary widely, so choose dimensions that align with your intended design and application area.

Customization options are another important factor. Kits that allow for personalization can enhance your creative expression. Some offer a range of threads and embellishments, enabling you to tailor patches to your specific taste. Budget considerations cannot be overlooked, as kits range from basic to premium. Evaluate your financial plan to find a kit that offers value without compromising quality.

Reading user reviews provides insight into real-world experiences, highlighting potential challenges and advantages. Brand comparisons are useful for identifying reputable manufacturers, assuring you invest in a product that matches your skill levels. For beginners, consider kits that provide thorough instructions and are designed to ease you into the art of patch-making. Choose wisely to guarantee a rewarding patch-making experience.

Gathering Necessary Materials

Having chosen the ideal DIY kit, the next step in your patch-making journey involves assembling the necessary materials to bring your creative vision to life. The importance of selecting the right materials cannot be overstated, as each component plays a critical role in ensuring the durability and aesthetic appeal of your patch. It is essential to evaluate both patch material selection and patch size considerations when gathering materials, as these factors will greatly influence your patch’s final appearance and functionality.

To streamline this process, here is a list of essential items you will need:

  1. Fabric Base: Choose a durable fabric such as cotton or polyester that aligns with your patch size considerations. The fabric should be sturdy enough to withstand regular wear and tear.
  2. Embroidery Thread: This is used to detail your design. Select threads in colors that complement your chosen fabric and design.
  3. Backing Material: Examine options like iron-on adhesive or sew-on backing, depending on your intended use for the patch.
  4. Cutting Tools: Precision cutting tools, such as fabric scissors or rotary cutters, are necessary to achieve clean edges and accurate shapes according to your patch size specifications.

Ensuring you have these materials will set a solid foundation for your patch-making project.

Exploring Design Options

When starting on the creative phase of patch-making, exploring design options becomes an enchanting venture that allows for personal expression and innovative artistry. This stage is essential, offering a canvas for your creativity to flourish. Design inspiration can stem from various sources, such as nature, popular culture, or personal experiences. It is important to allow your imagination to roam freely, while also reflecting on practical aspects like size and complexity, ensuring the design is feasible for a patch.

Color selection is a fundamental component of this process. The hues you choose will influence the patch’s impact and emotional resonance. Vibrant colors can convey energy and excitement, whereas muted tones might evoke a sense of calm or nostalgia. It is significant to contemplate how different colors interact, ensuring they complement each other and enhance the overall design. Additionally, think about the base fabric color, as it will affect the visibility and vibrancy of the chosen palette.

Incorporating these elements thoughtfully can transform an ordinary patch into a unique piece of art. By understanding the interplay between design inspiration and color selection, you can craft patches that truly reflect your creative vision.

Preparing Your Workspace

Creating an efficient workspace is essential for the seamless execution of your patch-making project. Proper workspace organization and lighting considerations are critical components that can greatly influence the quality of your work. Begin by selecting a dedicated area that is free from distractions and offers ample space for all necessary materials and tools. This thoughtful arrangement will facilitate a productive environment, allowing you to focus entirely on the creative process.

To prepare your workspace effectively, consider the following recommendations:

  1. Space Allocation: Make sure that your workspace is large enough to accommodate your DIY kit, fabric, cutting tools, and other accessories. A clutter-free environment enhances focus and efficiency.
  2. Lighting Considerations: Ideal lighting is key. Utilize natural light wherever possible, or install a bright, adjustable lamp to minimize shadows and reduce eye strain during detailed tasks.
  3. Tool Accessibility: Arrange your tools and materials within arm’s reach. This organization prevents unnecessary interruptions and maintains the momentum of your work.
  4. Surface Protection: Protect your work surface with a cutting mat or similar protective layer. This not only preserves the integrity of your workspace but also enhances precision in cutting and assembling your patches.

Implementing these strategies will guarantee a smooth and successful patch-making experience.

Techniques for Embroidery

Embroidery techniques form the backbone of any successful DIY patch project, transforming a simple piece of fabric into a detailed work of art. Mastering these techniques requires an understanding of various stitch styles and fabric types, each contributing to the distinct texture and appearance of your patch. Selecting the right stitch style is vital; it determines the patch’s durability and aesthetic appeal. Here are four essential techniques to take into account:

  1. Backstitch: Ideal for outlining and lettering, the backstitch provides a strong, clean line that enhances detail. Suitable for most fabric types, it guarantees a neat finish.
  2. Satin Stitch: Perfect for filling areas with a smooth, satin-like appearance. This stitching style works best with tightly woven fabrics, offering a polished and professional look.
  3. Chain Stitch: Known for its decorative flair, the chain stitch adds texture and depth. It is versatile across different fabric types, allowing for creative expression.
  4. French Knot: A charming addition, the French knot adds dimension and intricacy. Best for embellishing, it complements various fabrics with its three-dimensional effect.

Understanding these techniques will elevate your embroidery skills, guaranteeing that your DIY patches are both visually stunning and structurally sound.

Step-by-Step Patch Creation

  1. To commence the step-by-step patch creation process, start by selecting your desired fabric, making certain it is both durable and suitable for the intended application. Cotton or denim often serve as excellent choices due to their robustness. Once you have your fabric, gather your patch ideas and design inspiration. This step is essential, as it sets the foundation for your creative endeavor.
  2. Draw or print your chosen design onto paper, keeping in mind the size and complexity appropriate for your skill level. Transfer this design carefully onto the fabric using a fabric pencil or tailor’s chalk, guaranteeing clarity and accuracy. This outline will guide your next steps and prevent errors.
  3. Next, cut out the fabric patch, leaving a small margin around the design to accommodate any stitching or finishing techniques. As you proceed, consider the colors and threads that will best bring your design to life. Select threads that complement the design and fabric, balancing aesthetics and functionality.
  4. Finally, secure the fabric in an embroidery hoop to maintain tension and prevent unwanted movement during stitching. This setup is pivotal to achieving a polished final product, as it guarantees precision and consistency throughout the creation process.

Applying Your Finished Patch

Once you have meticulously crafted your DIY patch, the next critical step is applying it to your chosen surface, guaranteeing both adherence and alignment are flawless. Proper patch placement is paramount, as a misaligned patch can detract from the overall aesthetic and undermine the effort invested in its creation. Begin by identifying the ideal location for your patch on the garment or item, considering visibility and symmetry. Temporarily secure the patch with pins to verify its position before committing to a permanent bond.

When it comes to adhesive options, several methods can be employed, each with its own merits. Heat-activated adhesives, such as iron-on backing, offer a convenient solution for fabrics that can withstand high temperatures. Carefully follow the manufacturer’s instructions to avoid damaging the material. Alternatively, fabric glue provides a versatile option for items unsuitable for ironing but requires adequate drying time to guarantee a strong bond.

Sewing the patch is another reliable method, offering durability and a polished finish. Utilize a needle and thread that matches the patch’s border for a seamless appearance. Regardless of the method chosen, guarantee that the patch is securely affixed to withstand washing and regular wear.