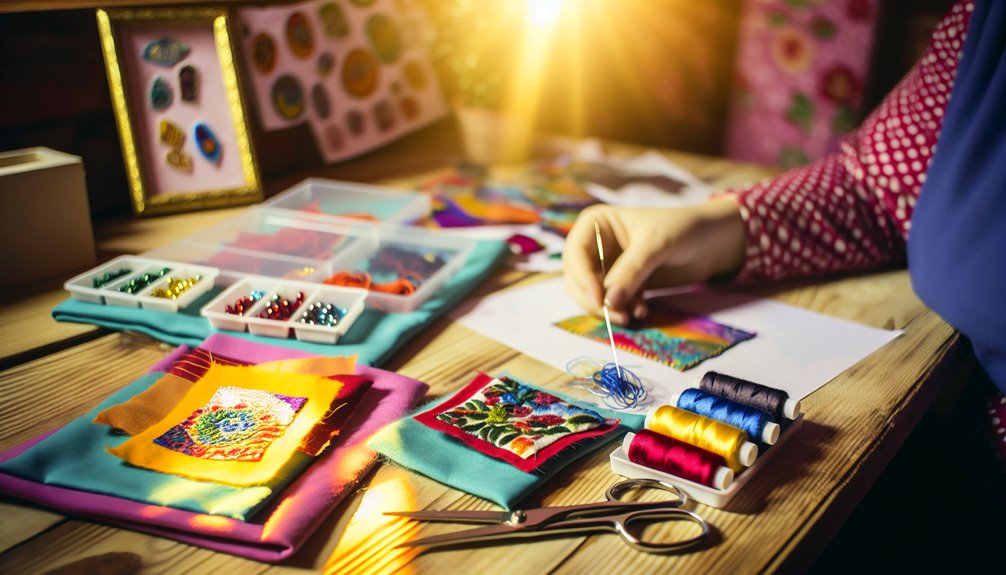
Creating your own patches with DIY kits requires a strategic approach. Start by selecting a kit that includes durable fabric, like cotton, and offers customization options such as varied thread colors and embellishments. Confirm your workspace is well-lit and organized with essential tools like fabric scissors and a cutting mat for precision. Then, focus on transferring your design onto the fabric, using techniques such as the backstitch or satin stitch for detailing. After completing the embroidery, choose your attachment method; heat-activated adhesives or sewing offer varying degrees of permanence. With these steps, you’ll create professional and personalized patches. Continue onward for further insights. Here are 5 prerequisites to get started.
1 – Fabric Selection
Evaluate fabric types in DIY kits, considering durability and application ease, to ensure a suitable base for your patch.
2 – Patch Sizing
Select patch dimensions that fit your design and intended application area for optimal results.
3 – Adding Personalization
Customize your patch using kits that offer various threads and embellishments for personal touches.
4 – Preparing Material
Prepare your workspace with the necessary materials and tools, ensuring a distraction-free, well-lit environment for patch creation.
5 – Stitching Technique
Use appropriate stitching techniques to secure your patch, offering durability and a polished finish.
Choosing the Right DIY Kit
Selecting the appropriate DIY kit is a vital first step in guaranteeing the success of your patch-making project. The right kit features can notably impact your creative journey, making it essential to understand the various elements involved. When evaluating fabric types, consider durability and ease of application. Common options include cotton and polyester, each offering unique benefits and requiring different handling techniques. Patch sizes vary widely, so choose dimensions that align with your intended design and application area.
Customization options are another important factor. Kits that allow for personalization can enhance your creative expression. Some offer a range of threads and embellishments, enabling you to tailor patches to your specific taste. Budget considerations cannot be overlooked, as kits range from basic to premium. Evaluate your financial plan to find a kit that offers value without compromising quality.
Reading user reviews provides insight into real-world experiences, highlighting potential challenges and advantages. Brand comparisons are useful for identifying reputable manufacturers, assuring you invest in a product that matches your skill levels. For beginners, consider kits that provide thorough instructions and are designed to ease you into the art of patch-making. Choose wisely to guarantee a rewarding patch-making experience.
Gathering Necessary Materials
Having chosen the ideal DIY kit, the next step in your patch-making journey involves assembling the necessary materials to bring your creative vision to life. The importance of selecting the right materials cannot be overstated, as each component plays a critical role in ensuring the durability and aesthetic appeal of your patch. It is essential to evaluate both patch material selection and patch size considerations when gathering materials, as these factors will greatly influence your patch’s final appearance and functionality.
To streamline this process, here is a list of essential items you will need:
Fabric Base: Choose a durable fabric such as cotton or polyester that aligns with your patch size considerations. The fabric should be sturdy enough to withstand regular wear and tear.
Embroidery Thread: This is used to detail your design. Select threads in colors that complement your chosen fabric and design.
Backing Material: Examine options like iron-on adhesive or sew-on backing, depending on your intended use for the patch.
Cutting Tools: Precision cutting tools, such as fabric scissors or rotary cutters, are necessary to achieve clean edges and accurate shapes according to your patch size specifications.
Ensuring you have these materials will set a solid foundation for your patch-making project.
Exploring Design Options
When starting on the creative phase of patch-making, exploring design options becomes an enchanting venture that allows for personal expression and innovative artistry. This stage is essential, offering a canvas for your creativity to flourish. Design inspiration can stem from various sources, such as nature, popular culture, or personal experiences. It is important to allow your imagination to roam freely, while also reflecting on practical aspects like size and complexity, ensuring the design is feasible for a patch.
Color selection is a fundamental component of this process. The hues you choose will influence the patch’s impact and emotional resonance. Vibrant colors can convey energy and excitement, whereas muted tones might evoke a sense of calm or nostalgia. It is significant to contemplate how different colors interact, ensuring they complement each other and enhance the overall design. Additionally, think about the base fabric color, as it will affect the visibility and vibrancy of the chosen palette.
Incorporating these elements thoughtfully can transform an ordinary patch into a unique piece of art. By understanding the interplay between design inspiration and color selection, you can craft patches that truly reflect your creative vision.
Preparing Your Workspace
Creating an efficient workspace is essential for the seamless execution of your patch-making project. Proper workspace organization and lighting considerations are critical components that can greatly influence the quality of your work. Begin by selecting a dedicated area that is free from distractions and offers ample space for all necessary materials and tools. This thoughtful arrangement will facilitate a productive environment, allowing you to focus entirely on the creative process.
To prepare your workspace effectively, consider the following recommendations:
Space Allocation: Make sure that your workspace is large enough to accommodate your DIY kit, fabric, cutting tools, and other accessories. A clutter-free environment enhances focus and efficiency.
Lighting Considerations: Ideal lighting is key. Utilize natural light wherever possible, or install a bright, adjustable lamp to minimize shadows and reduce eye strain during detailed tasks.
Tool Accessibility: Arrange your tools and materials within arm’s reach. This organization prevents unnecessary interruptions and maintains the momentum of your work.
Surface Protection: Protect your work surface with a cutting mat or similar protective layer. This not only preserves the integrity of your workspace but also enhances precision in cutting and assembling your patches.
Implementing these strategies will guarantee a smooth and successful patch-making experience.
Techniques for Embroidery
Embroidery techniques form the backbone of any successful DIY patch project, transforming a simple piece of fabric into a detailed work of art. Mastering these techniques requires an understanding of various stitch styles and fabric types, each contributing to the distinct texture and appearance of your patch. Selecting the right stitch style is vital; it determines the patch’s durability and aesthetic appeal. Here are four essential techniques to take into account:
Backstitch: Ideal for outlining and lettering, the backstitch provides a strong, clean line that enhances detail. Suitable for most fabric types, it guarantees a neat finish.
Satin Stitch: Perfect for filling areas with a smooth, satin-like appearance. This stitching style works best with tightly woven fabrics, offering a polished and professional look.
Chain Stitch: Known for its decorative flair, the chain stitch adds texture and depth. It is versatile across different fabric types, allowing for creative expression.
French Knot: A charming addition, the French knot adds dimension and intricacy. Best for embellishing, it complements various fabrics with its three-dimensional effect.
Understanding these techniques will elevate your embroidery skills, guaranteeing that your DIY patches are both visually stunning and structurally sound.
Step-by-Step Patch Creation
To commence the step-by-step patch creation process, start by selecting your desired fabric, making certain it is both durable and suitable for the intended application. Cotton or denim often serve as excellent choices due to their robustness. Once you have your fabric, gather your patch ideas and design inspiration. This step is essential, as it sets the foundation for your creative endeavor.
Draw or print your chosen design onto paper, keeping in mind the size and complexity appropriate for your skill level. Transfer this design carefully onto the fabric using a fabric pencil or tailor’s chalk, guaranteeing clarity and accuracy. This outline will guide your next steps and prevent errors.
Next, cut out the fabric patch, leaving a small margin around the design to accommodate any stitching or finishing techniques. As you proceed, consider the colors and threads that will best bring your design to life. Select threads that complement the design and fabric, balancing aesthetics and functionality.
Finally, secure the fabric in an embroidery hoop to maintain tension and prevent unwanted movement during stitching. This setup is pivotal to achieving a polished final product, as it guarantees precision and consistency throughout the creation process.
Applying Your Finished Patch
Once you have meticulously crafted your DIY patch, the next critical step is applying it to your chosen surface, guaranteeing both adherence and alignment are flawless. Proper patch placement is paramount, as a misaligned patch can detract from the overall aesthetic and undermine the effort invested in its creation. Begin by identifying the ideal location for your patch on the garment or item, considering visibility and symmetry. Temporarily secure the patch with pins to verify its position before committing to a permanent bond.
When it comes to adhesive options, several methods can be employed, each with its own merits. Heat-activated adhesives, such as iron-on backing, offer a convenient solution for fabrics that can withstand high temperatures. Carefully follow the manufacturer’s instructions to avoid damaging the material. Alternatively, fabric glue provides a versatile option for items unsuitable for ironing but requires adequate drying time to guarantee a strong bond.
Sewing the patch is another reliable method, offering durability and a polished finish. Utilize a needle and thread that matches the patch’s border for a seamless appearance. Regardless of the method chosen, guarantee that the patch is securely affixed to withstand washing and regular wear.
I'm a writer and embroidery enthusiast who is passionate about quality craftsmanship. I feel spiritual to share and review custom made products with a wider audience. I love writing SEO stuff for targeted market.
https://www.patchesmania.com/wp-content/uploads/2025/01/How_to_Create_Your_Own_Patches_With_DIY_Kits.jpg5751006Majidhttp://patchesmania.com/wp-content/uploads/2022/07/Patch-Mania-logo-2.pngMajid2025-01-19 18:57:382025-02-10 19:23:27How to Create Your Own Patches With DIY Kits
0replies
Leave a Reply
Want to join the discussion? Feel free to contribute!

Leave a Reply
Want to join the discussion?Feel free to contribute!