https://www.patchesmania.com/wp-content/uploads/2022/10/embroidering-logo.jpg6281200Majidhttp://patchesmania.com/wp-content/uploads/2022/07/Patch-Mania-logo-2.pngMajid2022-10-28 21:58:162024-03-14 01:59:24Myths and Fact About dst File Extension For Custom EmbroideryPATCH MANIA
https://www.patchesmania.com/wp-content/uploads/2022/10/merrow-vs-hot-cut.jpg6281200Majidhttp://patchesmania.com/wp-content/uploads/2022/07/Patch-Mania-logo-2.pngMajid2022-10-24 20:38:442024-03-10 17:51:44Types of Edge Stitches for Embroidery Vs Merrowed Border Patch
https://www.patchesmania.com/wp-content/uploads/2022/07/538FD4C1-52B7-4341-8AAF-8417E56AAB2A.jpg12801028Majidhttp://patchesmania.com/wp-content/uploads/2022/07/Patch-Mania-logo-2.pngMajid2021-02-16 23:28:292023-11-09 21:55:03Everything You Must Know About Custom Embroidery PatchesPATCH MANIA
https://www.patchesmania.com/wp-content/uploads/2020/11/embroidery-vs-weaved.jpg6281200Majidhttp://patchesmania.com/wp-content/uploads/2022/07/Patch-Mania-logo-2.pngMajid2020-11-25 11:37:362023-11-09 21:56:27Embroidered Patches Vs. Woven Patch – An Overview for a Smart Buyer
https://www.patchesmania.com/wp-content/uploads/2020/11/removing-embroidery.jpg10241024Majidhttp://patchesmania.com/wp-content/uploads/2022/07/Patch-Mania-logo-2.pngMajid2020-11-25 09:25:232023-11-09 21:56:35How to Remove An Embroidered Patch (Step by Step Guide)
https://www.patchesmania.com/wp-content/uploads/2022/07/IMG_4838.jpg750750Majidhttp://patchesmania.com/wp-content/uploads/2022/07/Patch-Mania-logo-2.pngMajid2020-10-12 06:12:572023-11-09 21:57:55How to Iron Custom Embroidered Patch Onto the Garments
https://www.patchesmania.com/wp-content/uploads/2022/07/IMG_7089_1.jpg20161512Majidhttp://patchesmania.com/wp-content/uploads/2022/07/Patch-Mania-logo-2.pngMajid2020-10-07 10:01:382023-11-17 23:32:49Common Types of Custom Made Embroidered Patches
 Patches Mania
https://www.patchesmania.com/wp-content/uploads/2023/11/victory-boy.png
900
1200
Majid
http://patchesmania.com/wp-content/uploads/2022/07/Patch-Mania-logo-2.png
Majid2023-11-15 17:56:572023-11-25 14:28:115 Key Feature To Understand Before Designing Maniac Logo
Patches Mania
https://www.patchesmania.com/wp-content/uploads/2023/11/victory-boy.png
900
1200
Majid
http://patchesmania.com/wp-content/uploads/2022/07/Patch-Mania-logo-2.png
Majid2023-11-15 17:56:572023-11-25 14:28:115 Key Feature To Understand Before Designing Maniac Logo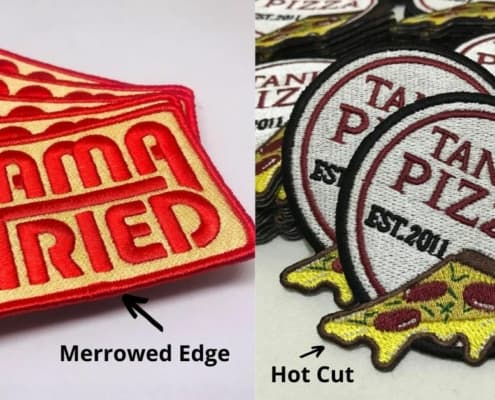 PATCH MANIA
https://www.patchesmania.com/wp-content/uploads/2022/10/merrow-vs-hot-cut.jpg
628
1200
Majid
http://patchesmania.com/wp-content/uploads/2022/07/Patch-Mania-logo-2.png
Majid2022-10-24 20:38:442024-03-10 17:51:44Types of Edge Stitches for Embroidery Vs Merrowed Border Patch
PATCH MANIA
https://www.patchesmania.com/wp-content/uploads/2022/10/merrow-vs-hot-cut.jpg
628
1200
Majid
http://patchesmania.com/wp-content/uploads/2022/07/Patch-Mania-logo-2.png
Majid2022-10-24 20:38:442024-03-10 17:51:44Types of Edge Stitches for Embroidery Vs Merrowed Border Patch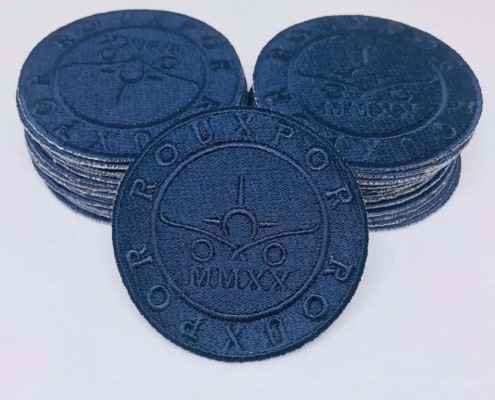 https://www.patchesmania.com/wp-content/uploads/2022/07/538FD4C1-52B7-4341-8AAF-8417E56AAB2A.jpg
1280
1028
Majid
http://patchesmania.com/wp-content/uploads/2022/07/Patch-Mania-logo-2.png
Majid2021-02-16 23:28:292023-11-09 21:55:03Everything You Must Know About Custom Embroidery Patches
https://www.patchesmania.com/wp-content/uploads/2022/07/538FD4C1-52B7-4341-8AAF-8417E56AAB2A.jpg
1280
1028
Majid
http://patchesmania.com/wp-content/uploads/2022/07/Patch-Mania-logo-2.png
Majid2021-02-16 23:28:292023-11-09 21:55:03Everything You Must Know About Custom Embroidery Patches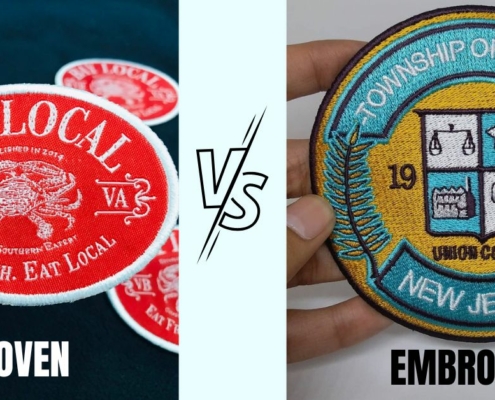 PATCH MANIA
https://www.patchesmania.com/wp-content/uploads/2020/11/embroidery-vs-weaved.jpg
628
1200
Majid
http://patchesmania.com/wp-content/uploads/2022/07/Patch-Mania-logo-2.png
Majid2020-11-25 11:37:362023-11-09 21:56:27Embroidered Patches Vs. Woven Patch – An Overview for a Smart Buyer
PATCH MANIA
https://www.patchesmania.com/wp-content/uploads/2020/11/embroidery-vs-weaved.jpg
628
1200
Majid
http://patchesmania.com/wp-content/uploads/2022/07/Patch-Mania-logo-2.png
Majid2020-11-25 11:37:362023-11-09 21:56:27Embroidered Patches Vs. Woven Patch – An Overview for a Smart Buyer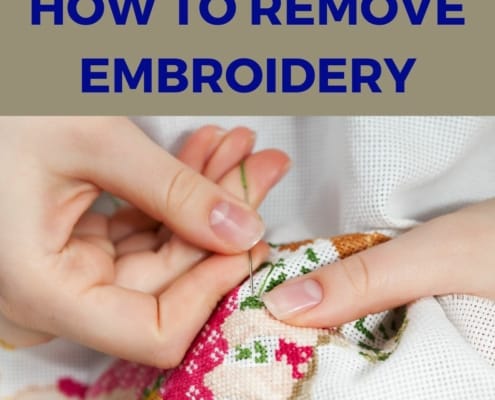 https://www.patchesmania.com/wp-content/uploads/2020/11/removing-embroidery.jpg
1024
1024
Majid
http://patchesmania.com/wp-content/uploads/2022/07/Patch-Mania-logo-2.png
Majid2020-11-25 09:25:232023-11-09 21:56:35How to Remove An Embroidered Patch (Step by Step Guide)
https://www.patchesmania.com/wp-content/uploads/2020/11/removing-embroidery.jpg
1024
1024
Majid
http://patchesmania.com/wp-content/uploads/2022/07/Patch-Mania-logo-2.png
Majid2020-11-25 09:25:232023-11-09 21:56:35How to Remove An Embroidered Patch (Step by Step Guide) https://www.patchesmania.com/wp-content/uploads/2022/08/fb-whatsapp.jpg
544
605
Majid
http://patchesmania.com/wp-content/uploads/2022/07/Patch-Mania-logo-2.png
Majid2020-11-04 05:06:002023-11-09 21:56:42Types of Keychains & Tags [Custom Made Plastic & Fabric]
https://www.patchesmania.com/wp-content/uploads/2022/08/fb-whatsapp.jpg
544
605
Majid
http://patchesmania.com/wp-content/uploads/2022/07/Patch-Mania-logo-2.png
Majid2020-11-04 05:06:002023-11-09 21:56:42Types of Keychains & Tags [Custom Made Plastic & Fabric]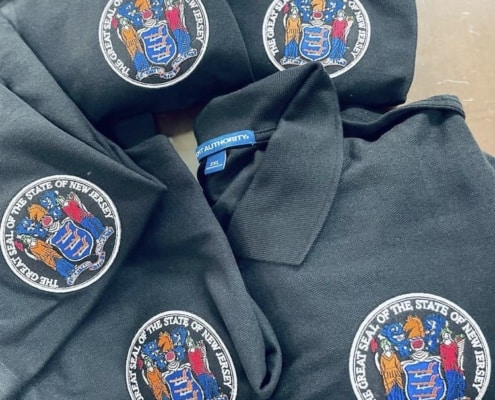 https://www.patchesmania.com/wp-content/uploads/2022/07/IMG_4838.jpg
750
750
Majid
http://patchesmania.com/wp-content/uploads/2022/07/Patch-Mania-logo-2.png
Majid2020-10-12 06:12:572023-11-09 21:57:55How to Iron Custom Embroidered Patch Onto the Garments
https://www.patchesmania.com/wp-content/uploads/2022/07/IMG_4838.jpg
750
750
Majid
http://patchesmania.com/wp-content/uploads/2022/07/Patch-Mania-logo-2.png
Majid2020-10-12 06:12:572023-11-09 21:57:55How to Iron Custom Embroidered Patch Onto the Garments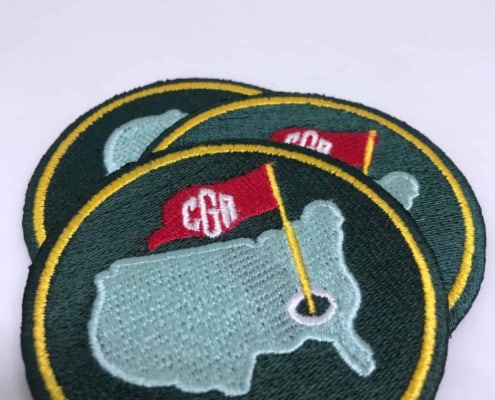 https://www.patchesmania.com/wp-content/uploads/2022/07/IMG_7089_1.jpg
2016
1512
Majid
http://patchesmania.com/wp-content/uploads/2022/07/Patch-Mania-logo-2.png
Majid2020-10-07 10:01:382023-11-17 23:32:49Common Types of Custom Made Embroidered Patches
https://www.patchesmania.com/wp-content/uploads/2022/07/IMG_7089_1.jpg
2016
1512
Majid
http://patchesmania.com/wp-content/uploads/2022/07/Patch-Mania-logo-2.png
Majid2020-10-07 10:01:382023-11-17 23:32:49Common Types of Custom Made Embroidered Patches